Github Actions Integration
This guide shows how to automatically deploy your application to Sliplane using Github Actions. At the end of this guide, you will be able to push to your repository, build your Docker image, push it to Github Container Registry, and deploy it to Sliplane. All automatically.
Setup Steps
Section titled “Setup Steps”-
Configure Github Repository Settings
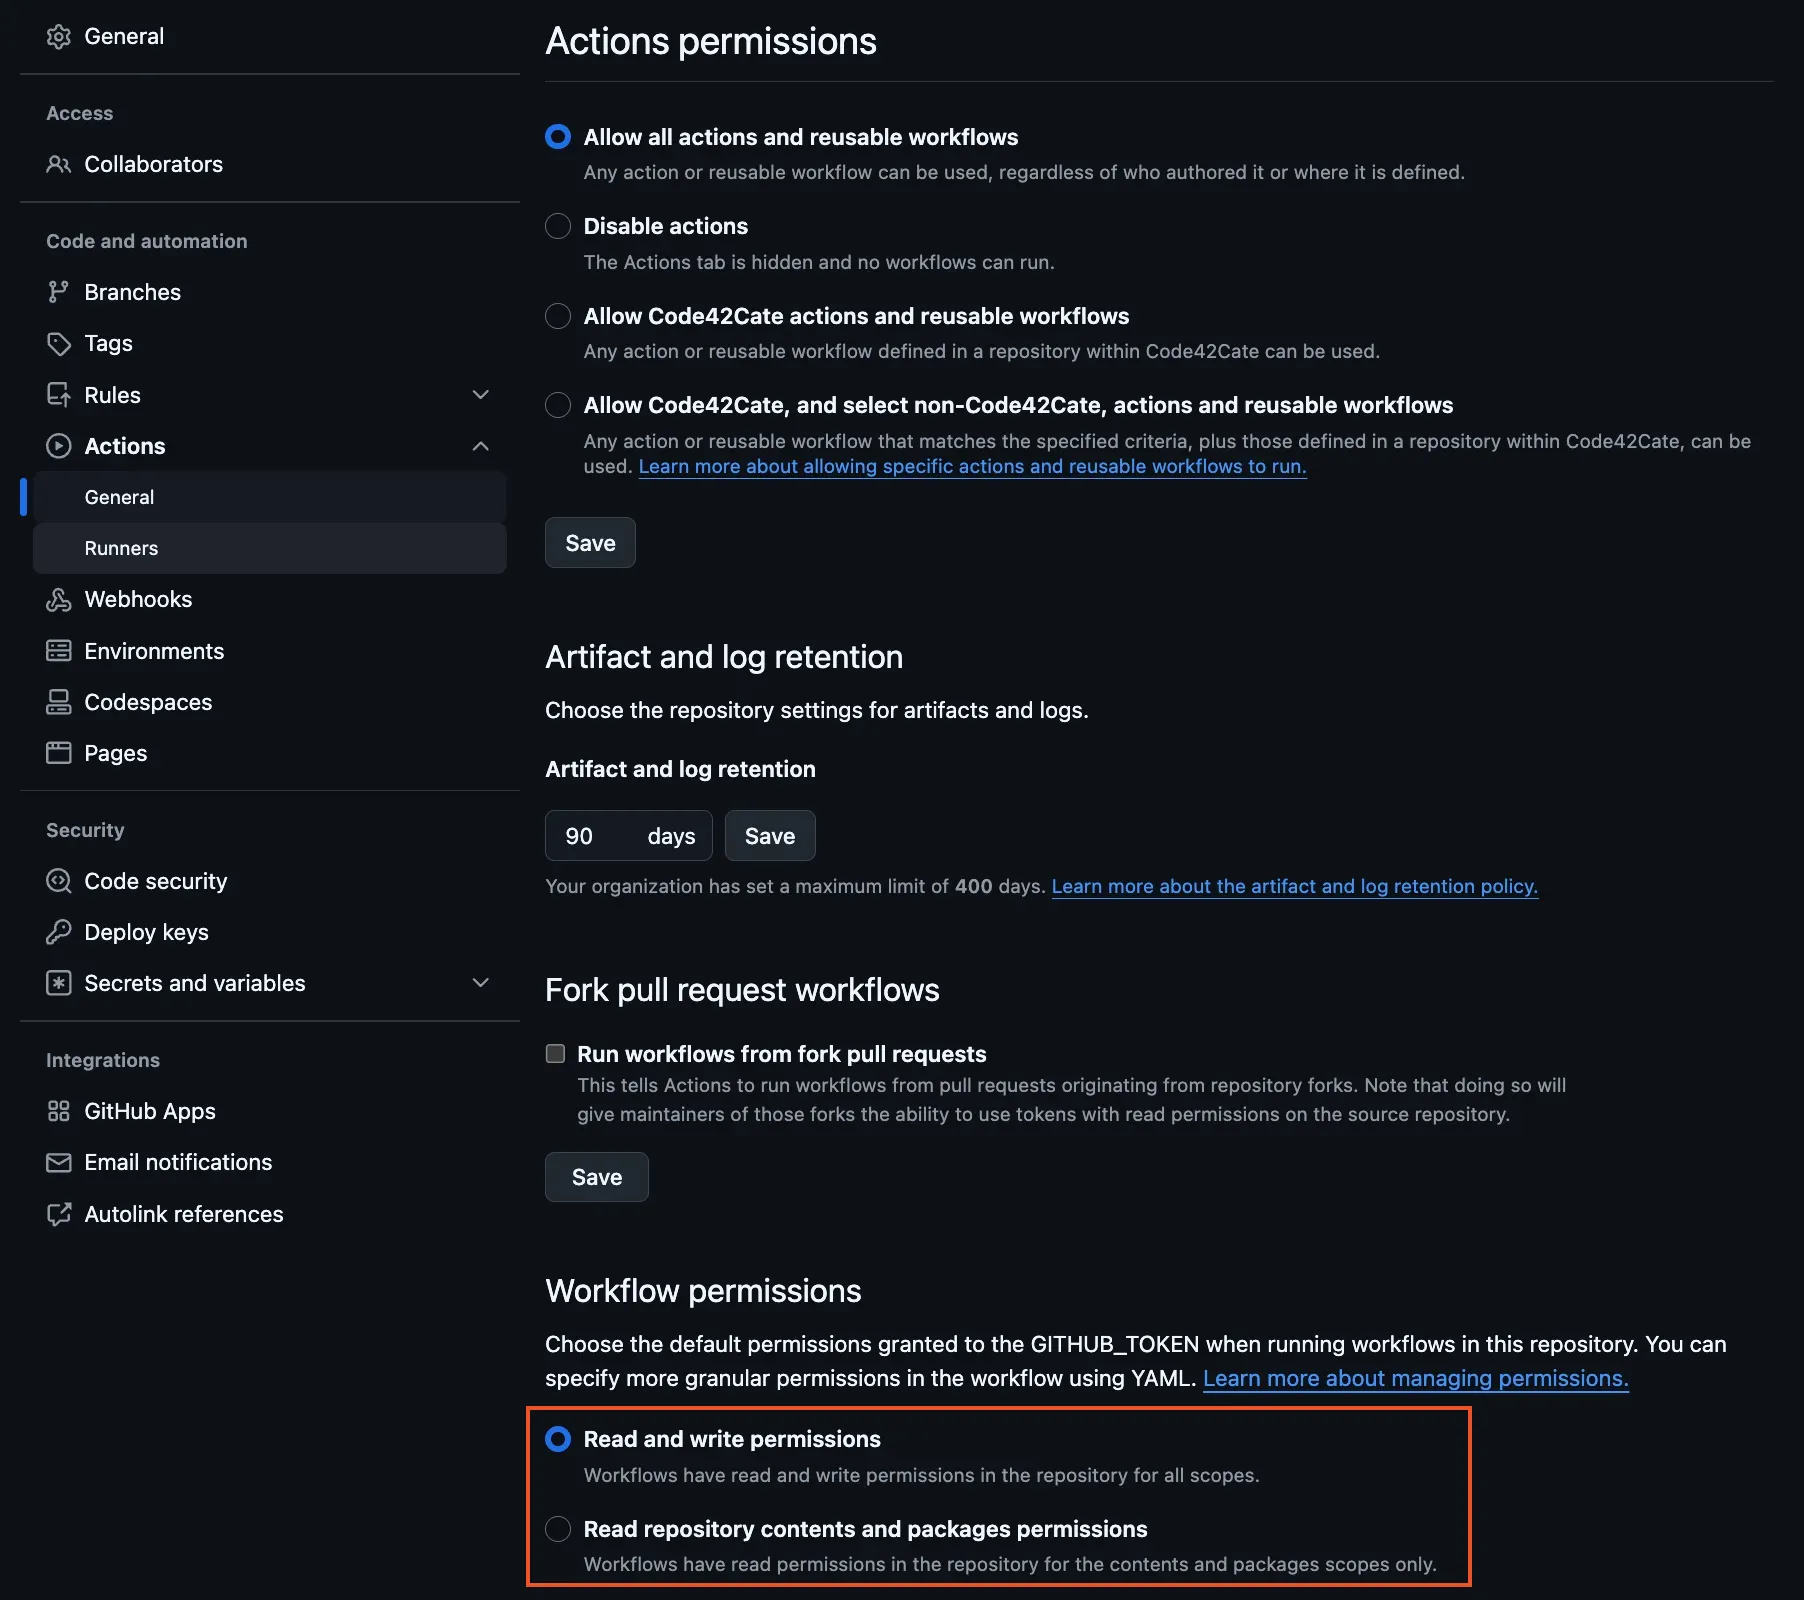
- Go to your repository’s Settings > Actions > General
- Under “Workflow permissions”, enable “Read and write permissions”
-
Create Github Personal Access Token
- Go to Github Token Settings
- Create a classic token with
read:packagespermission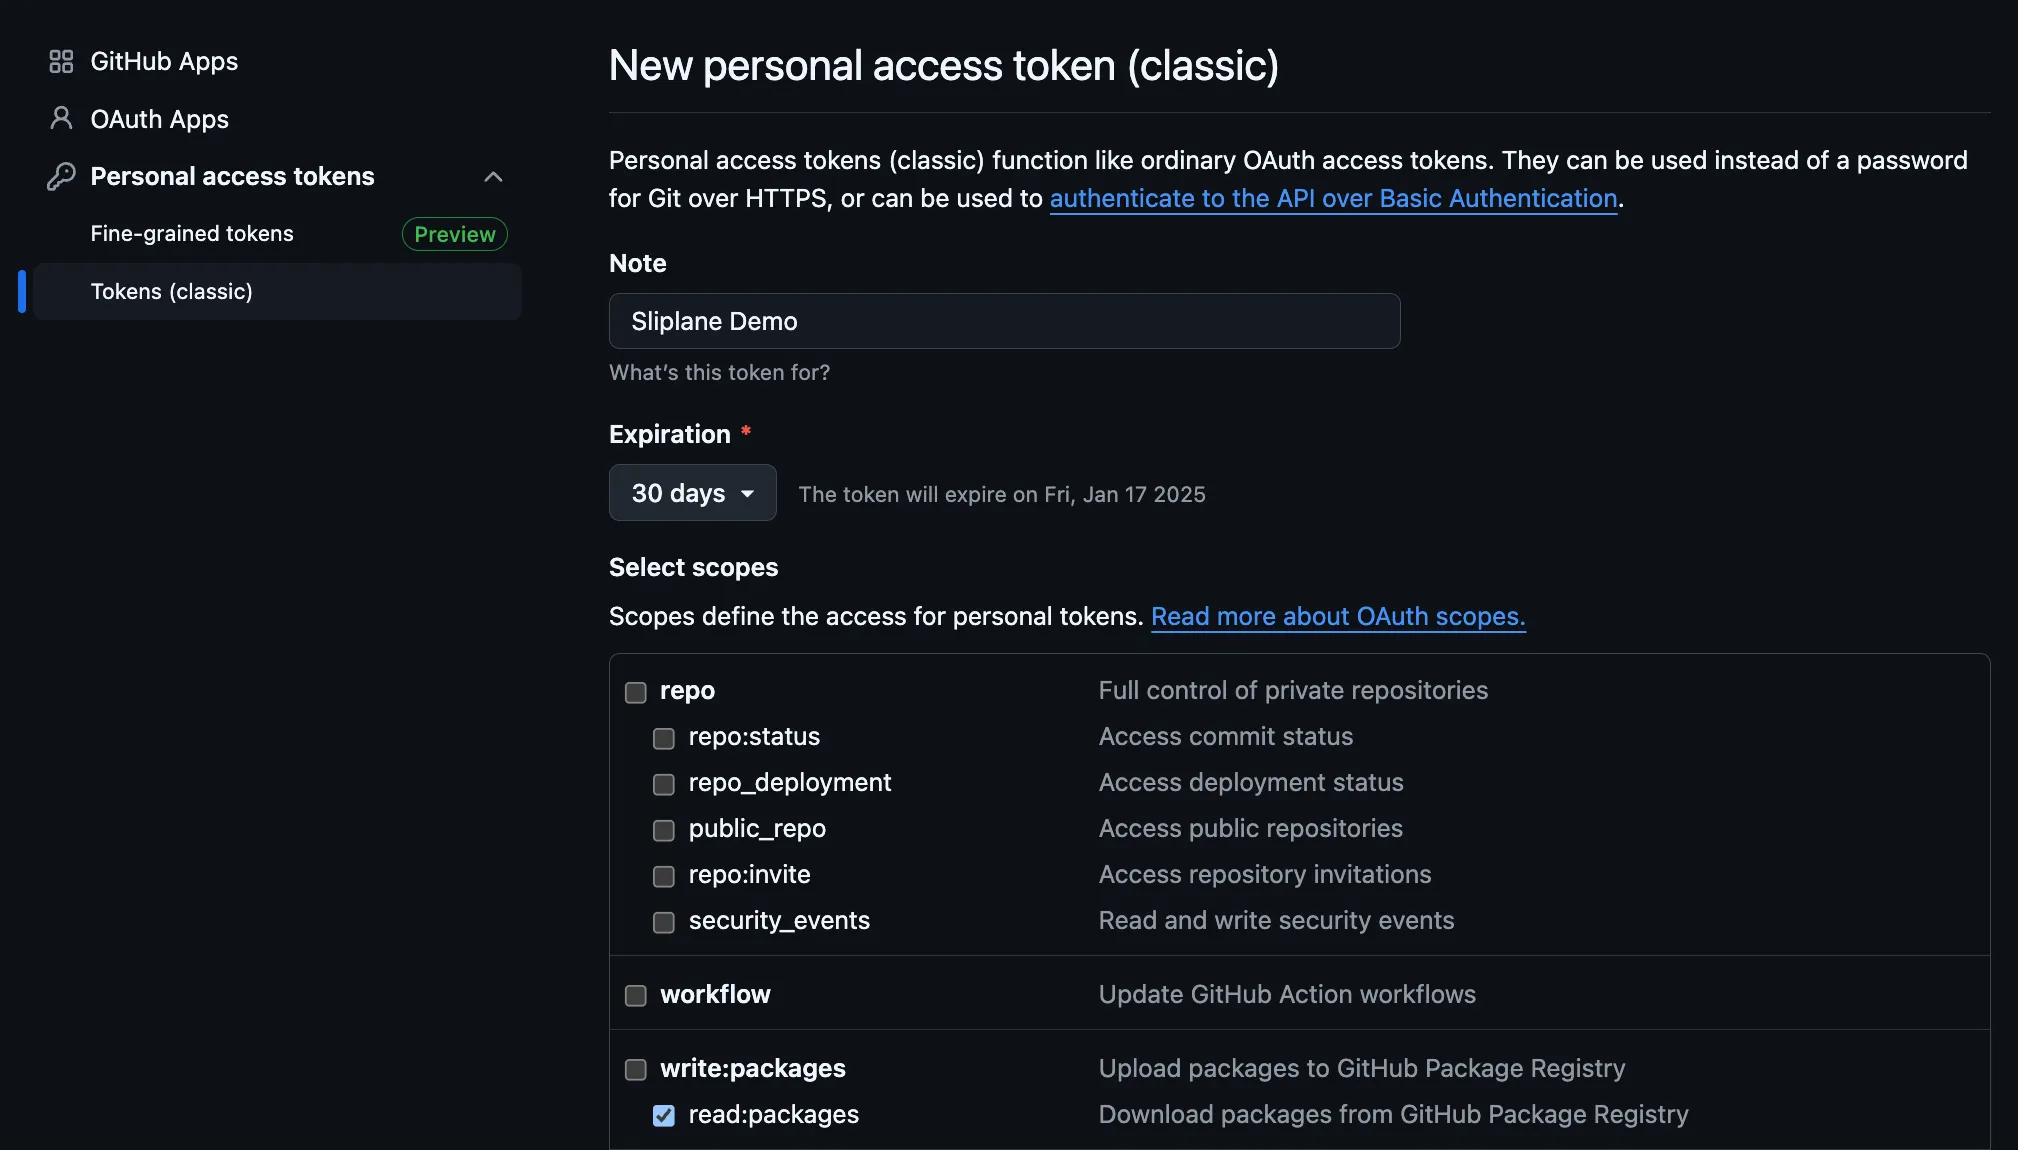
-
Add Registry Credentials to Sliplane
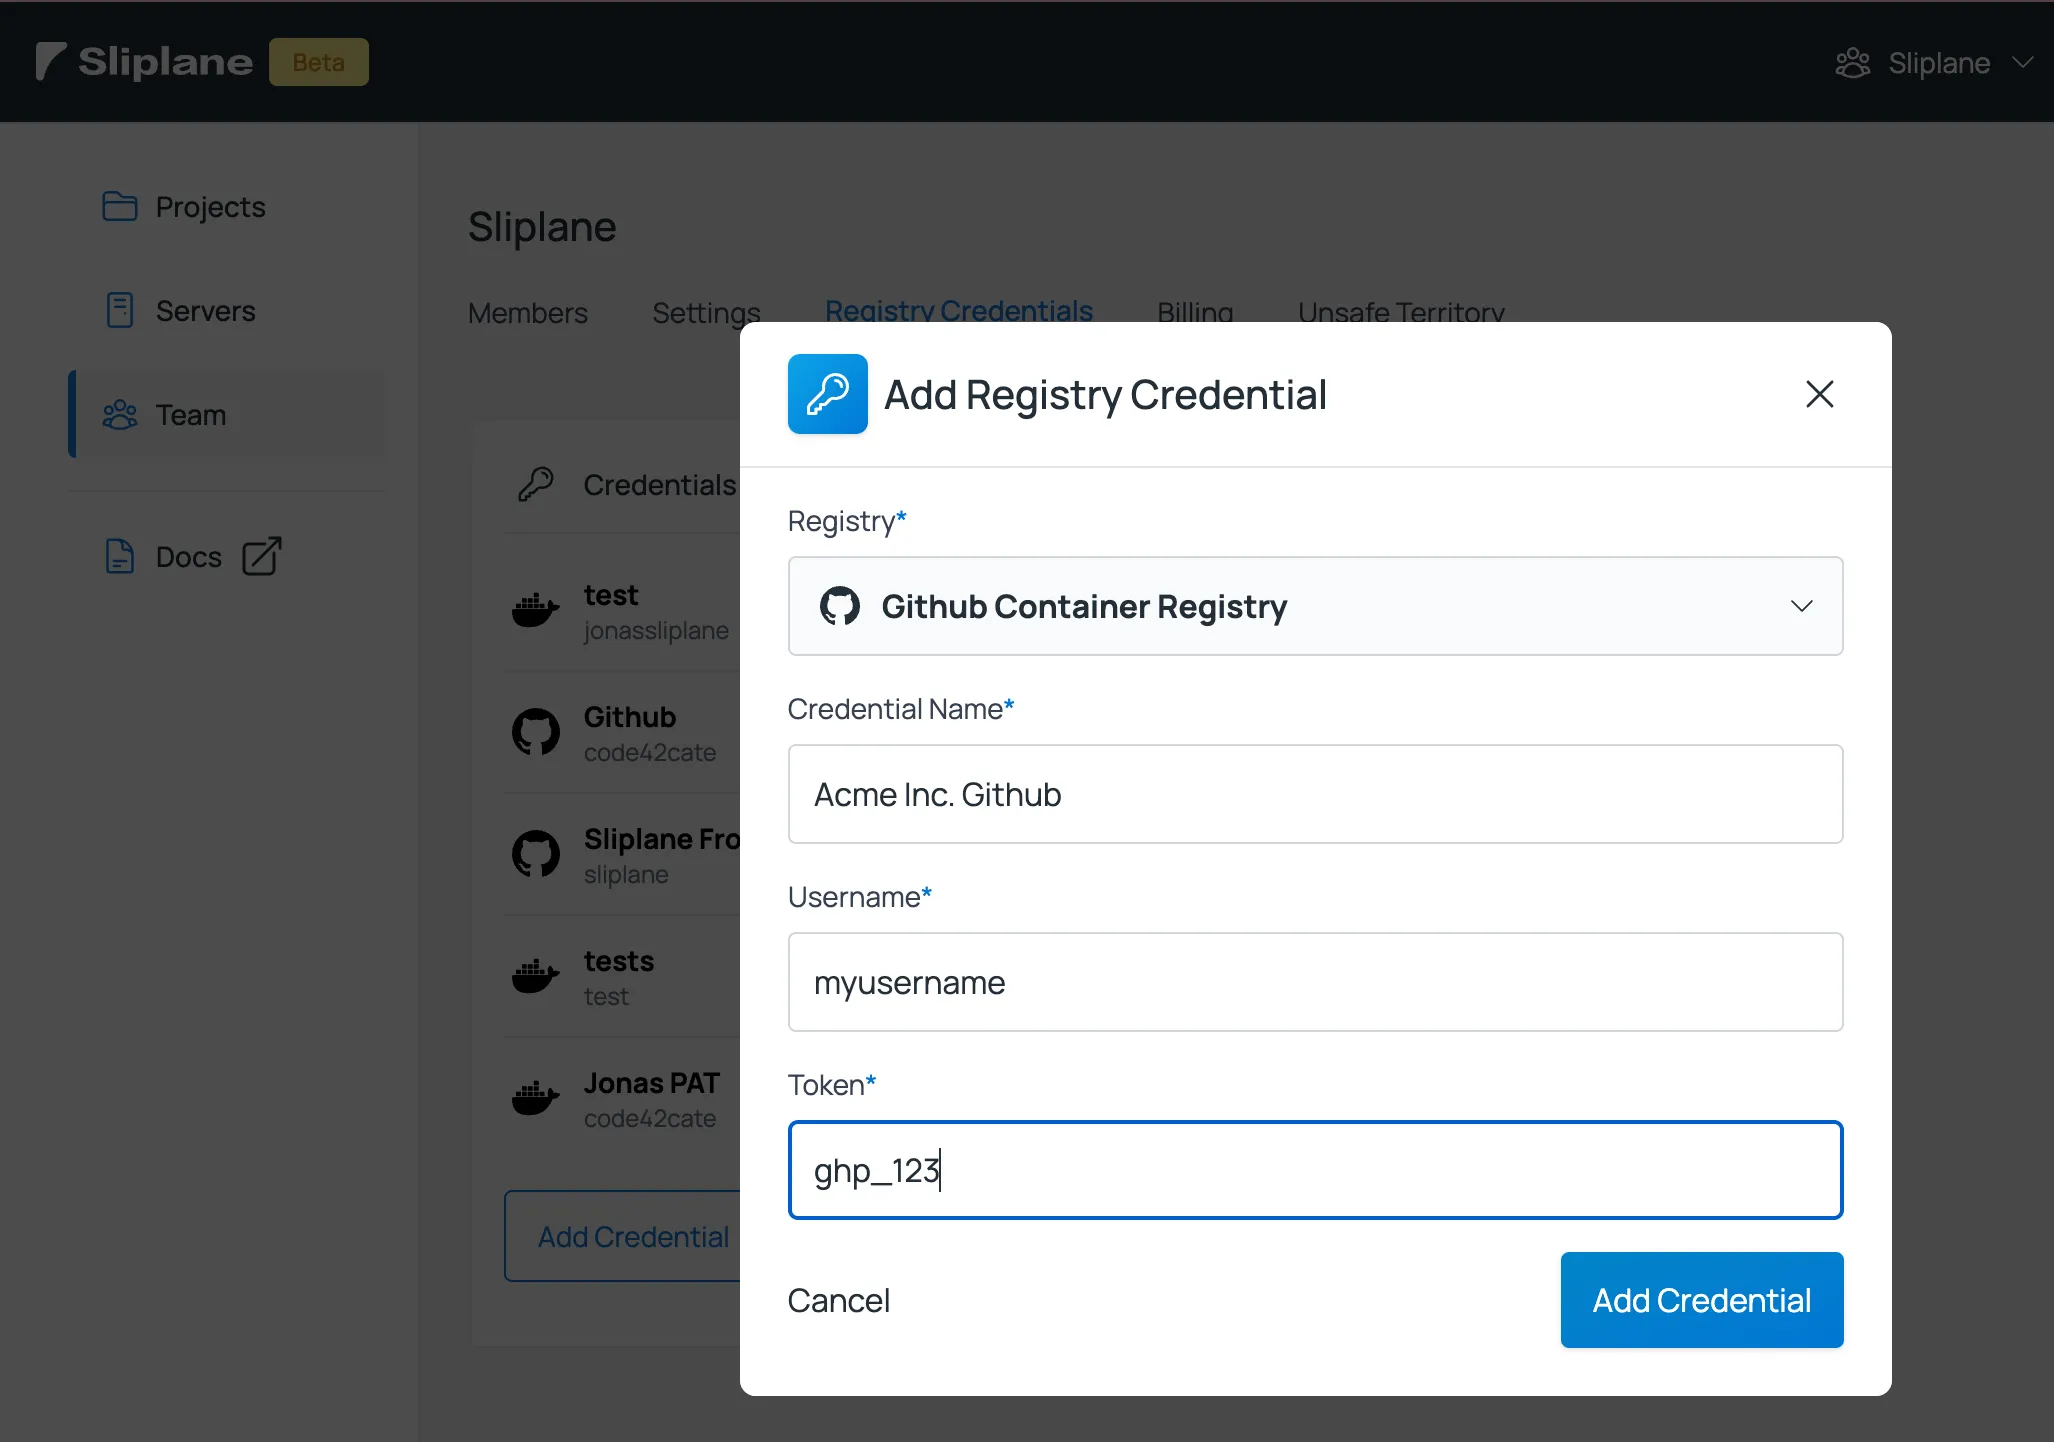
- Navigate to Registry Credentials
- Select “ghcr.io” as registry
- Enter your Github username and PAT token
-
Configure Github Secrets
- In your repository settings, add a new secret named
DEPLOY_SECRET - Copy the
dhs_part from your Sliplane deploy hook URL (see last screenshot)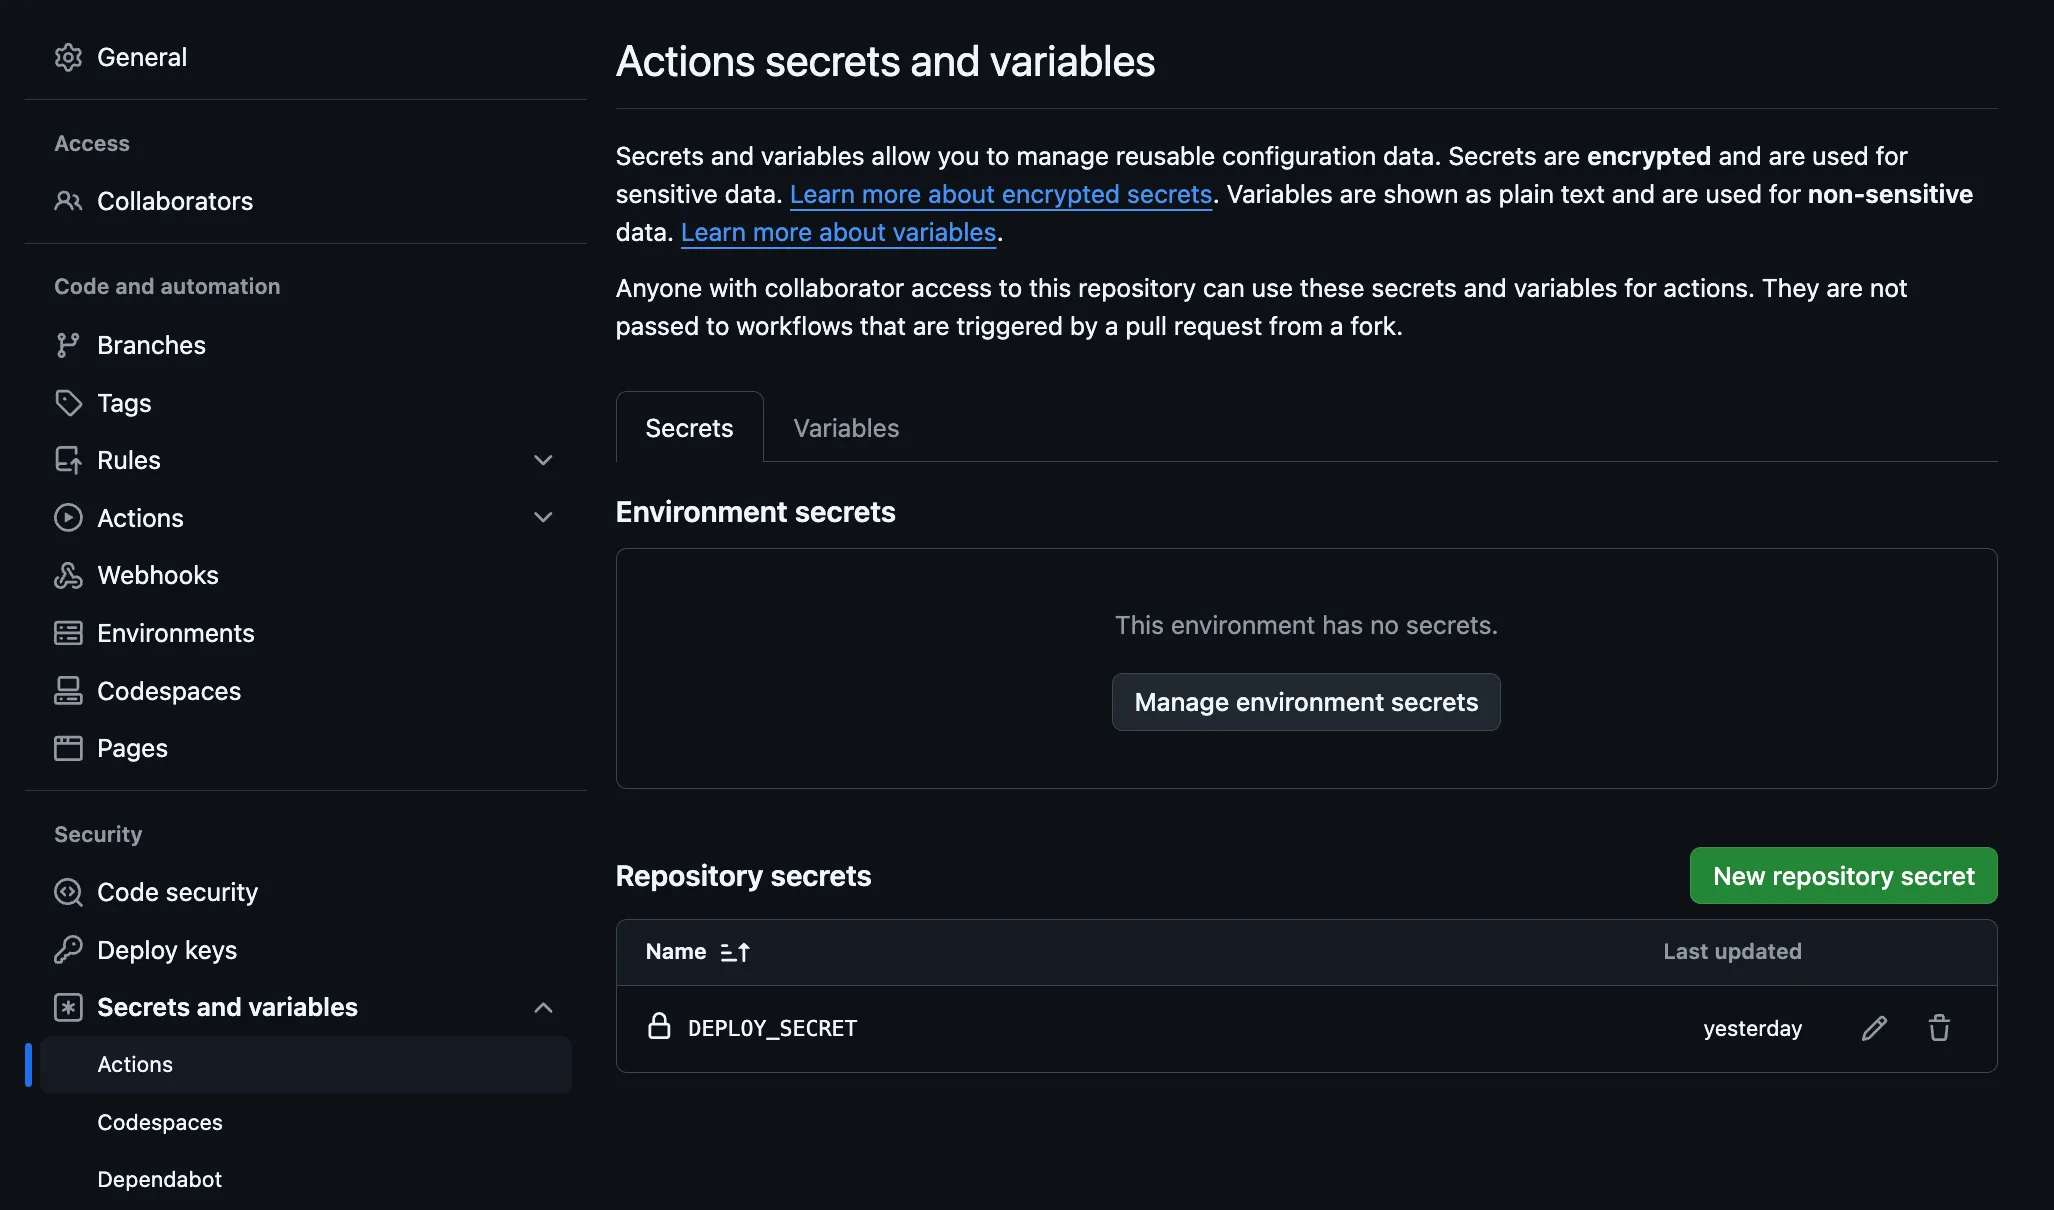
- In your repository settings, add a new secret named
-
Add Workflow File Create
.github/workflows/deploy.ymlwith the following content:
name: Docker Build and Sliplane Deploy
on:  push:    branches:      - main  workflow_dispatch:
jobs:  build-and-deploy:    runs-on: ubuntu-latest
    steps:      - name: Checkout code        uses: actions/checkout@v4
      - name: Login to GitHub Container Registry        uses: docker/login-action@v3        with:          registry: ghcr.io          username: ${{ github.actor }}          password: ${{ secrets.GITHUB_TOKEN }}
      - name: Set up Docker Buildx        uses: docker/setup-buildx-action@v3
      - name: Build and push Docker image        uses: docker/build-push-action@v5        with:          context: .          push: true          tags: |            ghcr.io/your-name/your-repo:latest            ghcr.io/your-name/your-repo:${{ github.sha }}
- name: Deploy to Sliplane run: | curl "https://api.sliplane.io/deploy/your-service-id/${{ secrets.DEPLOY_SECRET }}?tag=${{ github.sha }}"- Update Workflow Configuration
In the workflow file above:
- Replace
your-namewith your Github username - Replace
your-repowith your repository name - Replace
your-service-idwith your Sliplane service ID (found in service dashboard)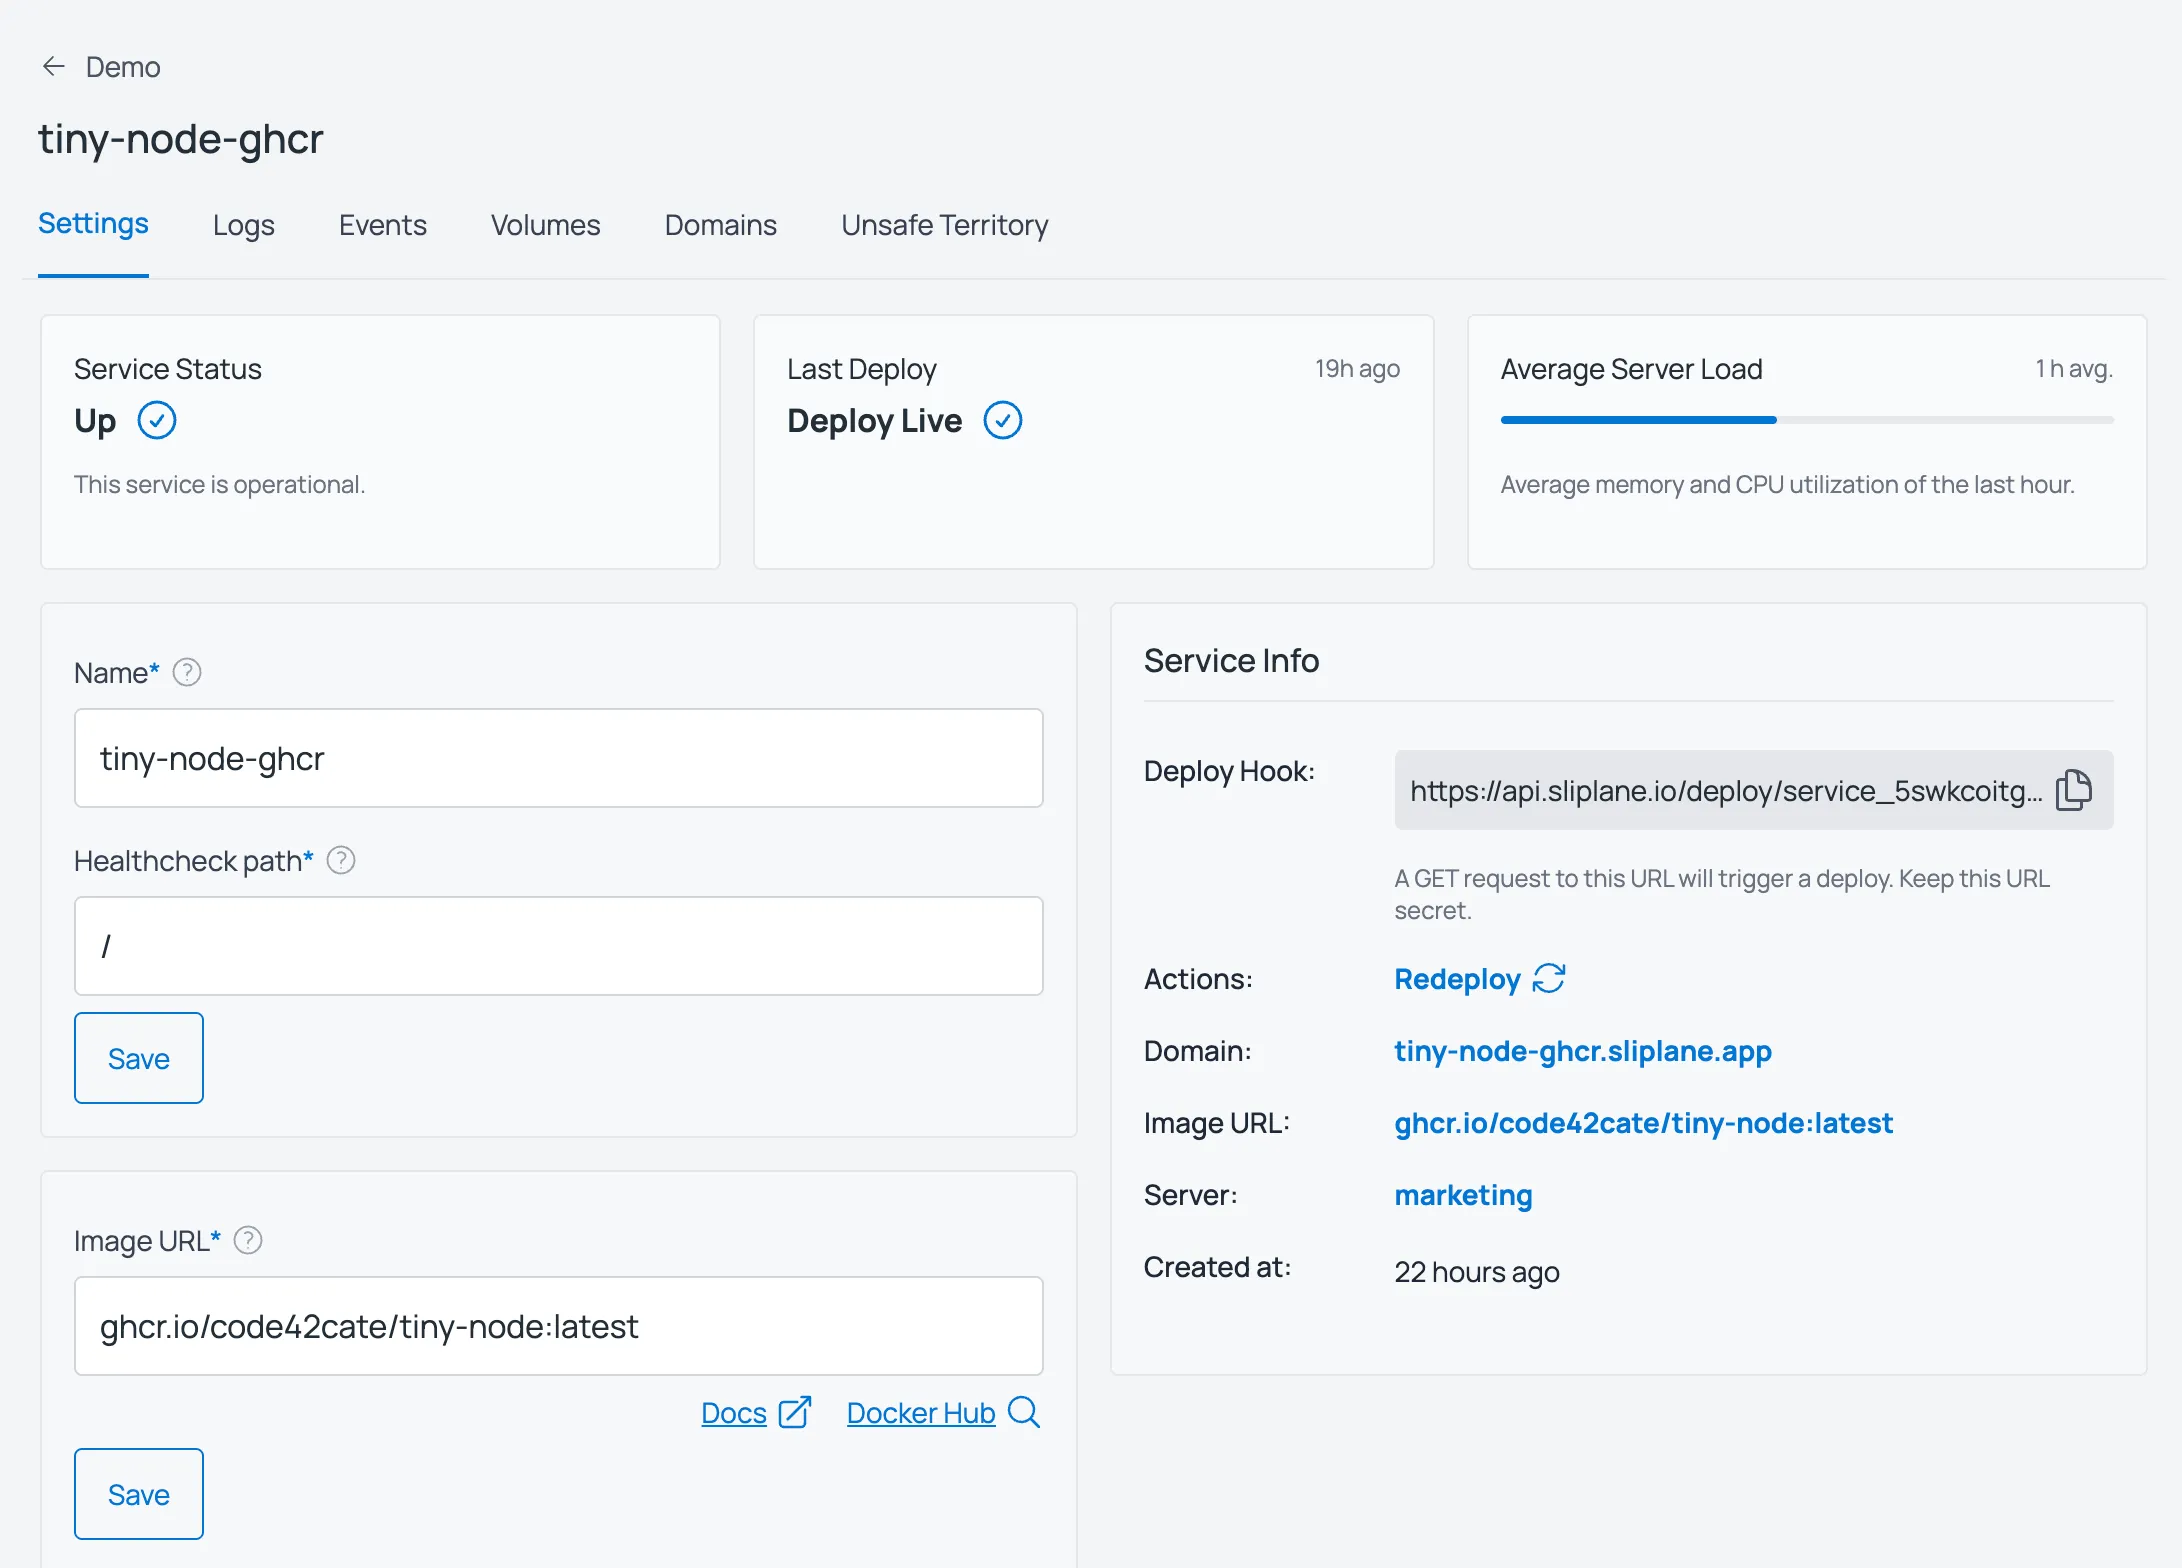
- Replace
Now when you push to the main branch, Github Actions will automatically build your Docker image and deploy it to Sliplane.